Indoor Grow Lights for Rooting Cuttings: Distance, Hours, and Wattage That Actually Work
Why Rooting Cuttings Want Less Light Than You Think
A cutting without roots cannot use light the way a rooted plant can. It has no root system pulling water to replace what transpires through the leaves, so pushing high-intensity light at a leafless or thin-rooted cutting just accelerates water loss and stress. The goal during rooting is not maximum photosynthesis—it is enough light to keep existing leaves productive and signal the cutting to stay in active growth mode, without demanding more water than the stem can move.
Most rooting setups do best in the 75 to 150 micromoles per square meter per second (PPFD) range, measured at the top of the tray. That is roughly a third to half of what the same plant would want once potted up and vegetating with a full root system. If you have a light meter or PPFD app, aim for the low end of that range for the first week and drift toward the higher end as callus and root initials form, usually seven to fourteen days in for most softwood cuttings.
Matching Wattage to Fixture Type
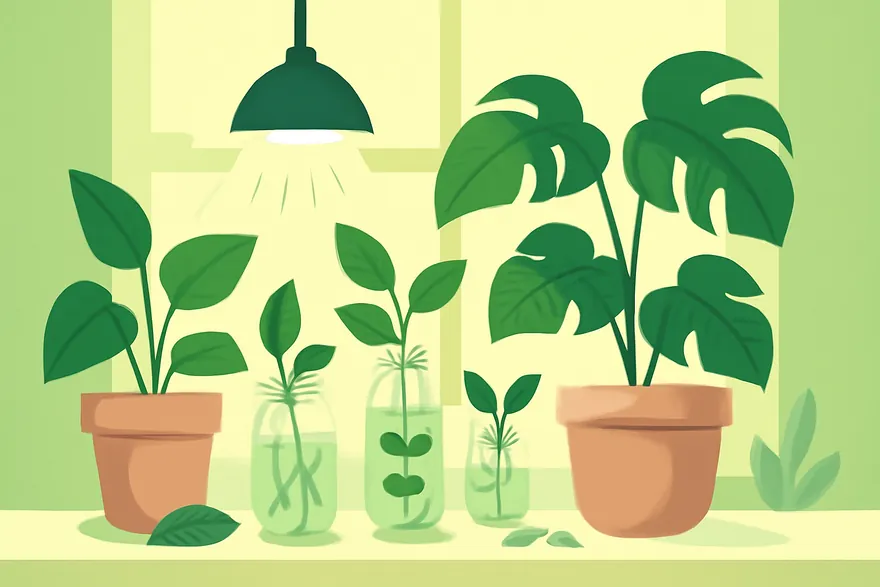
Actual (not "equivalent") wattage is what matters. Here is what tends to work per fixture type over a standard 10-by-20-inch tray:
- T5 HO fluorescent, single or dual tube (24–54W total): covers one tray well; this is the cheapest reliable option and the easiest to dial in because output is low and forgiving.
- Small full-spectrum LED panel (30–65W actual draw): covers one to two trays; check the manufacturer's PPFD chart at 12–18 inches rather than trusting "covers 2x2 feet" marketing claims.
- High-output COB or quantum-board LED (100W or more): too intense for rooting at full power; run it dimmed to 30–50 percent, or raise it well above the tray, or reserve it for the vegetative stage after transplant.
- Small clip-on LED grow lights (9–15W): fine for a single windowsill tray of two to four cuttings, run close since output is modest.
Skip anything marketed purely for bloom or flower boosting at this stage. Red-heavy "bloom spectrum" bulbs push a signal cuttings do not need yet; a cooler, full-spectrum bulb around 5000 to 6500 Kelvin more closely matches vegetative daylight and supports root and shoot development without pushing premature flowering hormones.
Distance: The Number That Prevents Stretch
Stretch (long, pale, leggy internodes reaching for the light) is almost always a distance-and-intensity problem, not a hours problem. Use these starting distances, measured from the bulb or LED diode surface to the top of the cutting's foliage, then adjust based on the signs below:
- T5 fluorescent: 6–8 inches
- Standard LED panel (30–65W): 12–18 inches
- High-output COB/quantum board: 20–24 inches, dimmed
- Small clip-on LED: 4–6 inches
Check distance weekly. As cuttings grow, the gap between light and foliage shrinks even if the fixture hasn't moved, and a fixture that was correctly placed on day one can end up too close by day ten. Raise the light (or lower the tray) as growth closes the gap, rather than waiting for scorch marks to tell you.
Heat at Close Range
LEDs run cooler than fluorescent or incandescent sources, but "cooler" does not mean cool. If you're running any fixture at the bottom of its recommended distance range, check media temperature with a probe thermometer rather than guessing by hand. Rooting media does best in the 65–75°F range; anything warmer speeds up mold and rot risk faster than it speeds up rooting.
Hours: Enough Light to Root, Not Enough to Stress or Trigger Dormancy
Sixteen hours on, eight hours off is the reliable default for rooting most cuttings, whether woody ornamentals, herbs, or houseplant stem cuttings. This is longer than a typical outdoor summer day on purpose: cuttings under artificial light are usually getting less total intensity than full sun, so the extra duration compensates without needing to raise wattage into stress territory.
Two mistakes show up constantly at either end of the schedule:
- Running lights 20–24 hours a day because "more light equals faster roots." Cuttings still need a dark period to move stored carbohydrates into the base where roots are forming. Continuous light measurably slows rooting in many species and increases leaf stress symptoms (curling, bleached tips) without speeding anything up.
- Running under 12 hours a day, often from using a leftover flowering-stage timer setting. Short photoperiods send a shortening-day signal that many species read as a cue to slow growth and prepare for dormancy—the opposite of what you want from a cutting that needs to be actively building tissue. Keep the minimum at 14 hours, with 16 as the safer target.
Put the light on a mechanical or smart timer. Manual on/off by memory drifts within a week and cuttings respond to that inconsistency with slower, uneven rooting.
Reading the Cuttings: Stretch, Algae, and Stall
The light setup is working if new leaf growth stays compact and the existing leaves stay turgid and green. When something's off, the symptom usually points straight at the fix:
- Long pale internodes, leaves reaching toward the fixture: light is too far away or too weak for the distance. Lower the fixture within its recommended range, or step up to a stronger fixture rather than moving a weak one closer than it's rated for.
- Leaf edges curling under, bleached or brown patches facing the light: too intense or too close. Raise the fixture two to four inches and recheck in three days before making a second adjustment.
- Green film or slime on the surface of moist rooting media, especially in clear cups or trays: light is reaching wet media directly, which is an algae bloom waiting to happen. Switch to opaque containers, wrap clear cups in foil or dark tape, and keep the humidity dome vented rather than fully sealed so condensation doesn't pool.
- No new growth after three to four weeks despite warm media and consistent watering: check the photoperiod first. Under 12 hours a day is the most common overlooked cause of a stalled cutting that otherwise looks healthy.
- Wilting despite consistently moist media: the cutting is transpiring faster than its undeveloped root system can supply. Lower intensity by raising the fixture or shortening the daily photoperiod by an hour or two until root initials are visible, then increase gradually.
Once you see white root tips at drainage holes or resistance when you gently tug a cutting, it's rooted enough to shift toward the higher end of the PPFD range and, within another week or two, onto a normal vegetative lighting schedule.
Questions and answers
What light setup should I use when rooting cuttings indoors?
Choose the light and spacing by fixture type. A T5 HO setup in the 24–54W range is a reliable one-tray option, while a small full-spectrum LED panel (30–65W) usually covers one to two trays at about 12–18 inches if you use its PPFD guidance. For tiny clip-on LEDs at 9–15W, keep them close at 4–6 inches for a small tray of cuttings, and treat high-output COB or quantum-board fixtures as too intense unless dimmed to around 30–50 percent or raised.
How do I avoid stretch, algae, and stalled cuttings?
Most problems point to light setup. Stretch or pale, elongated leaves usually mean light is too far or too weak, so move it closer within the safe range or increase fixture strength. Curling, bleach, or brown patches toward the light suggest too much intensity, so raise by about two to four inches and recheck after three days. Green film or slime on wet media often means light is hitting wet media directly; block it with opaque containers, foil, or dark tape and vent the dome so condensation does not pool. For stalling, check photoperiod first if it is near 12 hours.