Why Your Cuttings Keep Dying — and How to Diagnose the Real Cause
Most propagation advice stops at "don't overwater," which is true and also useless, because the cuttings that die from a soggy environment and the cuttings that die from a bone-dry one look almost identical for the first few days: droopy, dull, discouraging. The fix depends on which failure you're actually looking at. Below are the three patterns that account for nearly every dead cutting, what each one tells you about your setup, and the specific changes that stop it from happening again.
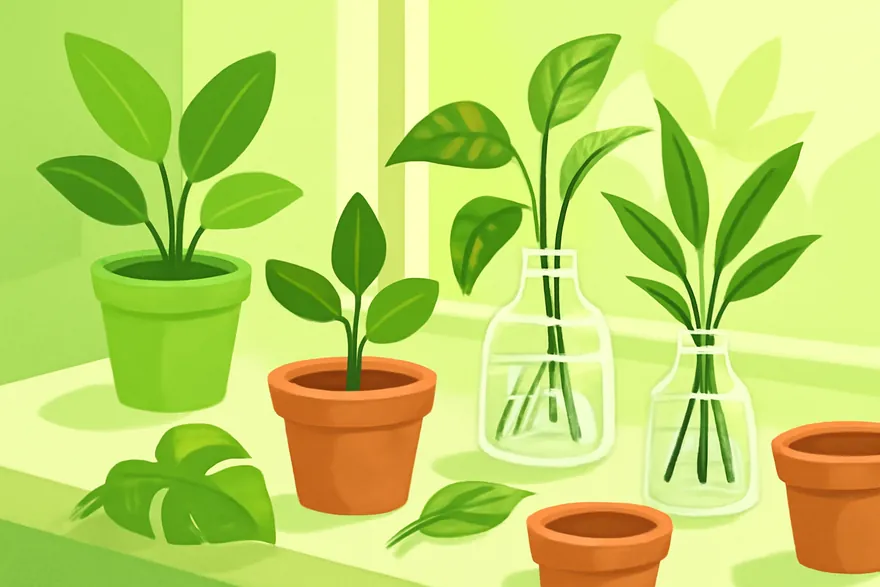
Read the Corpse First: Three Failure Patterns
Before changing anything, pull the cutting and look at the stem. The visual evidence points to a specific cause almost every time.
- Black or brown, soft, mushy stem at the base, often with a sour or sulfur-like smell and the outer tissue sliding off when you touch it. This is bacterial or fungal rot from an oxygen-starved medium, not "too much water" in the simple sense — plenty of cuttings sit in wet perlite for weeks and root fine because the medium still drains and breathes.
- Wilting, droopy leaves on a stem that is still firm and green when you pinch it near the base. This is a moisture-balance failure: the leaves are losing water through transpiration faster than a rootless stem can pull any in, usually because humidity around the leaves is too low for how much leaf surface you left on the cutting.
- Leaves turning translucent, glassy, or developing water-soaked patches while the stem stays green and firm. This points to the opposite problem — the medium or air is so saturated that cells are taking on water faster than they can process it, sometimes worsened by cold, still air trapping condensation directly on the foliage.
If you started ten cuttings and lost eight to blackened stems, the medium is the problem. If you lost eight to crispy, curled-up leaves within 48 hours, the air around the cutting was too dry. Treating a humidity problem by watering more, or treating a drainage problem by misting more, makes things worse in both directions.
Humidity: Easy to Undershoot, Easier to Overshoot
Softwood cuttings (most houseplants, herbs, and shrub tip cuttings) need roughly 70 to 85 percent relative humidity around the leaves for the first 10 to 14 days, while they have zero root mass to replace lost water. Below about 50 percent, thin-leaved cuttings — coleus, pothos, tomato, most herbs — wilt within a day even in perfectly moist medium, because the leaf surface is transpiring faster than the cut stem can wick water upward through capillary action alone.
The usual fix is a humidity dome or a clear bag, but two mistakes cancel out the benefit:
- Sealing it completely for the full duration. Trapped humidity above roughly 90 percent with no exchange breeds grey fuzzy mold (botrytis) within 4 to 7 days, especially on damaged leaf edges or flower buds left on the cutting. Crack the dome or bag 1 to 2 centimeters, or punch two or three small holes, from day one.
- Wiping condensation off the inside of the dome once and forgetting it. Condensation dripping back onto leaves keeps foliage wet around the clock, which is a direct invitation for fungal spotting. Wipe it down daily, and step humidity down gradually starting around day 10 to 14 by venting for 15 to 20 minutes twice a day, working up to no dome at all by week three once you see white root tips.
Crispy brown leaf edges with an otherwise green, firm stem means humidity was too low. Grey fuzz or black spotting on leaf tissue with no smell at the stem means humidity was too high with too little airflow — which is the next variable, and the one people skip.
Drainage and Medium: Oxygen at the Cut End Matters More Than Water
Roots — and the callus tissue that forms before roots — need oxygen at the cut surface to develop. Standard potting soil holds water in fine particles and excludes air between them, so a cutting sitting in wet potting mix is effectively sitting in an anaerobic pocket. Anaerobic bacteria move in within days, and that's the source of the sour smell and blackened stem base described above.
Switch to an inert, fast-draining medium built for rooting, not for feeding an established plant:
- 50 percent perlite mixed with 50 percent coco coir or peat holds moisture around the stem without staying waterlogged.
- Pure perlite or a perlite-vermiculite mix works even better for the first two to three weeks for rot-prone species (succulents, African violets, begonias), since you can transplant into richer soil once visible roots exist.
- The container must have drainage holes, and it should never sit in a saucer of standing water for more than an hour after watering — set it on a tray with pebbles instead if you need to catch runoff.
Use the squeeze test to judge moisture rather than a schedule: grab a handful of medium and squeeze — it should feel like a wrung-out sponge, damp with no water dripping out. Depending on humidity dome coverage, that usually means watering only every 3 to 5 days, not daily. Cuttings that rot almost always come from medium that was recharged with water before it had a chance to dry back to that wrung-out state.
Airflow: The Variable Hiding Inside Your Humidity Setup
Here's the part that trips people up after they've already fixed humidity and drainage: still, stagnant air at 75 percent humidity is far more dangerous to a cutting than gently moving air at the same humidity. Fungal spores need still, saturated air to germinate and spread; a small amount of air movement disrupts that without meaningfully lowering the humidity the cutting needs.
Practical fixes that don't require expensive equipment:
- Point a small desk fan on its lowest setting at the propagation tray from 2 to 3 feet away, oscillating rather than fixed, for a few hours a day rather than running it constantly.
- If you're using a dome without a fan, the daily venting routine described above (15 to 20 minutes, twice a day) does double duty — it lowers humidity slightly and exchanges the stagnant air at the same time.
- Trim off any leaf that's already showing grey mold or a soft brown spot immediately, using clean scissors, rather than waiting to see if it spreads — it almost always spreads.
A Diagnostic Checklist Before You Try Again
- Pull one failed cutting and check the stem: black and mushy points to drainage/medium; firm and green with wilted leaves points to humidity; translucent leaf tissue points to over-saturation or cold.
- Check the medium with the squeeze test right now — if water runs out when squeezed, repot into a 50/50 perlite mix before starting new cuttings.
- Check the humidity dome or bag for unwiped condensation and confirm there's at least a small vent gap — full seal for more than a few days is a near-guaranteed mold risk.
- Add gentle air movement for a few hours daily if you've had any grey fuzz or spotting on previous attempts, even after fixing humidity and medium.
One honest caveat: not every failed batch is an environmental mistake. Some species root slowly and unevenly no matter what you do — hydrangea, fig, and lilac hardwood cuttings can sit for three to six weeks before showing any root activity, and pulling them early to "check" does more damage than the wait. Flowering or woody, older stem sections also root far less reliably than fresh, non-flowering tip growth, so if the environment checks out on every point above and cuttings still fail, look at what part of the plant you cut before troubleshooting the tray again.
Questions and answers
How can I quickly identify the real cause when a cutting starts dying?
Read the failure pattern before treating. If the stem base is black or brown, soft, and mushy, often with sour smell and outer tissue sliding when touched, this is rot from an oxygen-starved medium. If the stem stays firm and green but leaves are droopy, that is usually humidity imbalance and not root failure. If leaves turn translucent, glassy, or have water-soaked patches while the stem is still firm and green, the issue is usually over-saturation or cold around the foliage.
What should I change to balance humidity, drainage, and airflow?
Keep softwood cuttings at roughly 70 to 85 percent relative humidity for the first 10 to 14 days, but never fully sealed with no exchange: a full seal can trap over 90 percent humidity and raise mold risk in 4 to 7 days. Start venting from day one with a 1 to 2 centimeter gap or 2 to 3 small dome holes, wipe condensation daily, and add gentle moving air (for example a low fan 2 to 3 feet away, oscillating a few hours a day).